One of my favorite shows to watch is Good Eats on the Food Network. I enjoy seeing the science and history behind the food the Alton Brown makes. I recently saw the episode where Alton builds a smoker out of terra cotta pots and various other parts. I had seen the episode before, but this time I decided that I wanted to make my own. I wanted to be able to try a new method of cooking that I had not done before.
The pieces and parts I needed were:
- terra cotta pot (mine ended up being a 14.5″ pot)
- terra cotta bowl (also 14.5″)
- terra cotta pot feet
- grill grate (also 14.5″)
- pan to hold wood chips (I ended up with an 8″ cake pan)
- electric hotplate
- replacement grill thermometer
- patio paver
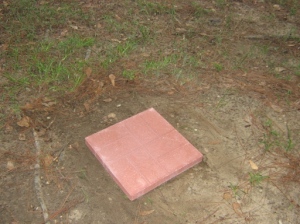
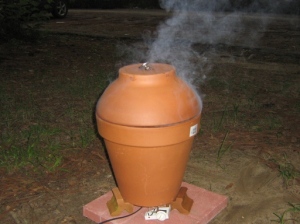
After I had finally gotten all the parts needed, I started to set up the smoker. First I set down the patio paver to provide a level surface and keep the smoker up off the ground.
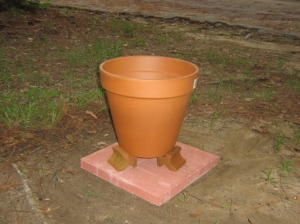
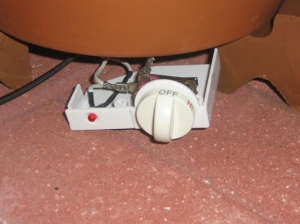
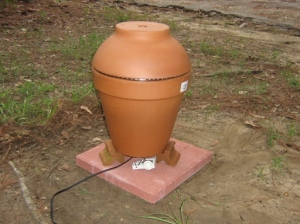
Next, I set down the pot feet and the larger pot on top of them. This gives some room for both air flow and the controls of the hot plate.
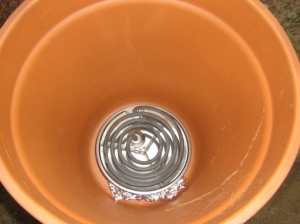
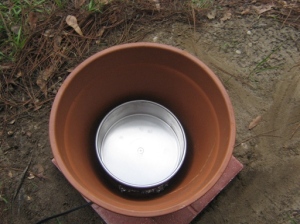
Next, I put the element of the hotplate inside the pot and connected it to the controls, which remain outside. I did this by taking apart the hotplate. It wasn’t too difficult and all the wires easily connect and disconnect. The tinfoil below the element is used to keep it level.
This is the pan that will hold the wood chips/chunks.
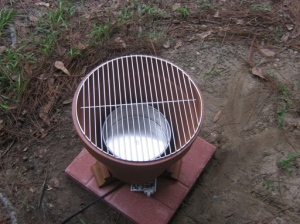
And this shows the grill grate placed on top of the pot. I was hoping the grate would fit down inside the pot and rest on the lip inside, but I guess that will be something I can work on for the future.
The terra cotta bowl is inverted on the top to be the lid.
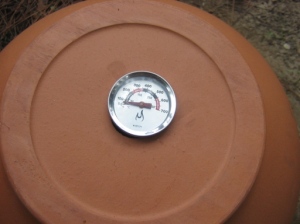
The grill thermometer is placed in the hole in the lid so the temperature can be monitored.
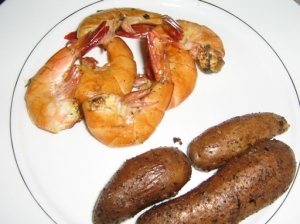
After all that, I was finally ready to crank it up and smoke some food. I wanted to try something that didn’t need to be cooked long just so I could make everything worked correctly. I decided to try shrimp after remembering that Anthony Bourdain had smoked shrimp on an episode of No Reservations in Chicago. I was happy to see that the grocery store had gotten fresh wild shrimp that day. I also decided to try to smoke some fingerling potatoes that I saw at the store. When I got home, I marinated the shrimp in olive oil, lemon juice, thyme, garlic, and green onion. I let this sit in the refrigerator for an hour while I started up the smoker.
To get the smoker going, I placed a couple handfuls of hickory chips into the pan and turned on the hotplate. I tried to keep the temperature between 225° and 250°. Next, I seasoned the potatoes with oil, salt, dried parsley, ground sage, and garlic powder. I put these on the smoker first to give them a head start on the shrimp. When the potatoes had been cooking for about 40 minutes, I took the shrimp out of the marinade and put them on the smoker.
I let the shrimp smoke for about 20 minutes and then took everything off of the smoker.
The shrimp turned out pretty good. The marinade gave the shrimp some good flavor and the addition of smoke was something I had not experienced before with shrimp. The potatoes had cooked for about an hour but probably could have used a little more time on the smoker. All in all, this meal turned out pretty well and will be something I will cook again in the future.
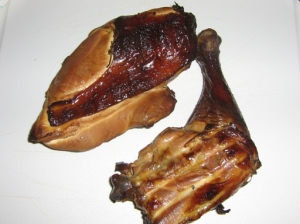
After having success with the shrimp, I decided to go up to the next step and try chicken. I bought a whole chicken and broke it down myself. (See the archives of A Hunger Artist for guidance on this) The night before I wanted to smoke the chicken, I brined it to add flavor and help keep it moist while it smoked. I loosely based the brine on the one in Michael Ruhlman’s Ratio (which, by the way, is a great book that you should go buy right now). I only used water, salt, lemon, thyme, sugar, bay leaf, and pepper, though. I left the chicken in the brine in the refrigerator overnight.
Again, when I was ready to start the smoker, I threw a couple handfuls of hickory chips into the pan and turned on the hotplate. Again, I tried to keep the temperature between 225° and 250°. When the smoker was up to temperature, I rinsed and dried the chicken and placed it in the smoker. From reading online, I was prepared to have this go for at least 2 hours, if not more. The smoke started to subside after about an hour and a half. When I opened the smoker to add more hickory chips, I decided to check the temperature of the chicken. It was already over 160°, so it was done. I guess the 2-3 hours is for a whole chicken that is not broken down.
This turned out pretty well too. I could subtly taste the ingredients of the brine and the smoke added another layer of flavor. As you can see in the picture, I can still practice and improve my butchery skills.
So this turned into a pretty successful weekend for home barbecue/smoking. Now that I have the equipment and a couple successful runs under my belt, my next try may be with something that cooks for a longer time, such as pork shoulder for pulled pork. I’ll let you know how it goes.

That’s seriously clever.
Thanks for the comment. Have to give credit to Alton Brown though.
HA! Wait until I convince my husband to make one of this for me! 🙂
actually, I could probably do it myself, I think –
I have a stove top smoker, which I rarely use because it’s a pain to clean, but this terracota assembly seems amazing to me… plus, it would sit outside, no need to have my hair perfumed with applewood
Nice post!
Thanks. It is nice to have it outside with all the smoke. You could do it yourself. The hardest part (which really wasn’t all that hard once I figured it out) was getting the electric burner apart to fit inside.
I think I might even have some old electric burner components around the lab – great opportunity to put them to good use 🙂